How to on T Shirt Screen Printing
Where Do You Start
The time has arrived. You are ready to start your t-shirt screen printing and needs some help. Consider the possibility that the ink washes off. Imagine a scenario where the client is unsettled. Consider the possibility that you put the print in the wrong area. Perhaps this wasn’t the business you needed all things considered. Awful, isn’t it! Don’t let T Shirt Screen Printing overwhelm you!
Luckily, you’ll get over it – yet these are the issues and issues that face starting printers.
This article is about some essential things of making a print. These are things that fledglings AND experienced printers need to know. Ensure your current printers read this article. How frequently has a printer revealed to you how long he has just to not have the capacity to deliver an attractive shirt.
The Screen
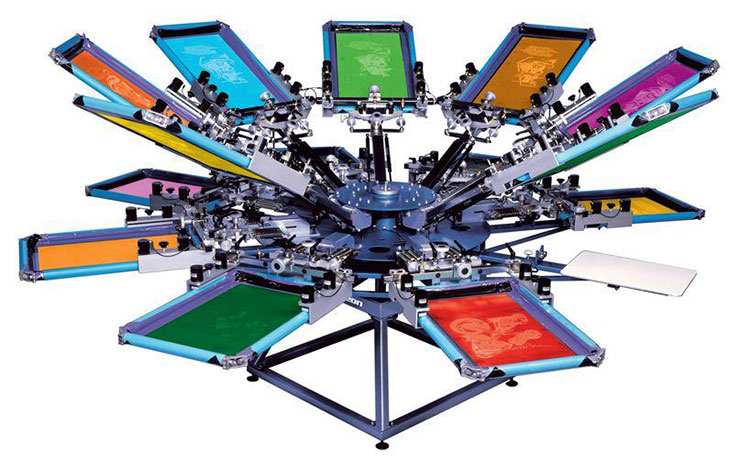
With the end goal of this article we will expect you have a screen made utilizing the right work. I would utilize a 160 (61cm) to 180 (70cm) monofilament work with either all around made wood outlines that have been acquired with the texture officially appended (prestretched) OR I would utilize a metal retentionable screen that I had conveyed to the best possible strain two or multiple times to get the texture tight. I pick the 160 to 180 on the grounds that I need to set out somewhat less ink since this is a multicolor activity AND in doing as such I won’t need to streak fix between hues.
I would likewise have utilized a double fix photograph polymer emulsion as my stencil since they can be utilized with just a solitary coat on each side and they hold up well, yet recover effectively.
Press Set-up
Square the Screen to the Shirtboard The screen should be set on the press and squared to the shirtboard. This is as basic as putting a t-square under the casing and glancing through the screen to square the picture on the casing to the edge of the board. Presently when you make a print it will be directly to the board.
Multicolor Print Sequence
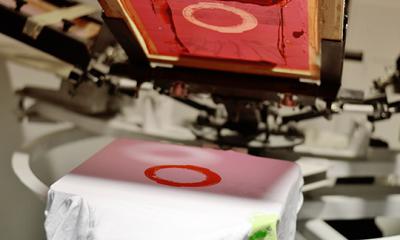
When printing multicolor prints on light shirts you for the most part print the lightest shading to darkest shading OR the littlest print zone to the biggest zone. This grouping, alongside the correct ink consistency will help limit ink getting on the screen bottoms. This is rung construct and is a typical issue in multicolor printing. The least demanding approach to arrange screens on a multicolor print is to make a print of the layout or primary shading and simply line-up different screens to the print. Beyond any doubt you may get a little ink on the base of the screen yet prepare to be blown away. It will clear appropriate off.
Alter the Off-Contact Distance
The screen MUST be set to sit marginally off the shirtboard. This is canceled contact printing and is the manner by which all great printing is finished. A few presses have changes for this. Others should have the screen shimmed from underneath. In any case, you may need to put a dainty bit of cardboard under the edge of the casing so it will hit the shirtboard as the screen descends. This may appear to be strange, however once more, trust me. You have to keep the screen from 1/16″ to 1/8″ off the shirt and regardless of how all around made a manual press is, the tip of the screen is going to move descending when you get as far as possible of the stroke and nothing is going to keep it off the board yet a basic shim.
The Ink
This is one territory where there is a great deal of perplexity. The ink producer disclosed to you that the stuff in the can was “Prepared for Use” (RFU). That implies simply slop it in the screen and “siphon up” to make a print. RFU is one of the best lies at any point told.
Try not to Be Afraid of Additives
Most ink available it excessively thick to print effectively by hand. It by and large needs a slight measure of decrease – diminishing – to make it work better. Diminishing does not mean making it milder so I am looking at including a treatable reducer instead of a “delicate hand” added substance. A little measure of reducer will make the ink progressively functional.
Flimsy Some Colors More Than Others
Since our test work is a three-shading print we will thin our lightest hues somewhat more. This will by and large be the FIRST COLOR YOU PRINT and it needs to infiltrate INTO the piece of clothing more than the others so you won’t lift it up on the bottoms of different screens. In the event that dark is our last shading, we can thin it less. It needs to lay over different hues and will mix in with the undercolors in the event that it is excessively slim.
Mix the Ink First
Plastisol ink will in general get somewhat thicker or “body up” when it isn’t being used so you ought to ALWAYS STIR THE INK BEFORE YOU THIN IT. By mixing the ink you will see whether it actually needs more slender. I favor an ink that is smooth and rich to one that is thick to the point that you break the stick endeavoring to mix it.
The amount Ink to Use
Regardless of what I let you know here, regardless of how little ink you put in the screen, a few people are bound to make a wreck. I have had printers who might never get a drop on them and have the screen brimming with ink – and other people who got ink on them by simply taking a gander at the press. You are in an ideal situation putting a little measure of ink over the back of the screen. You need enough to make various great prints without running dry, however less that when you print everything rides up on the squeegee handle. It is a lot simpler to put more ink in a screen and harder to take the abundance out!
What Squeegee to Use
This is another easy to refute thing. The fury presently is a triple durometer squeegee that has a harder revolve around a milder external edge. These really do give you more control, particularly in the event that you have a ton of solidarity and attempt to level the sharp edge as you make the print. (No, you truly would prefer not to straighten the cutting edge.) The truths are that you could get an “out-dated” medium hardness edge with a sharp edge and make an extraordinary print. Notice that I said sharp edge. A sharp edge shears off the ink neatly and will make dd an a lot more honed print than a dull edge cutting edge. On the off chance that you are a muddled printer, you should utilize the more extensive 5″ handles. These will help keep your fingers out of the ink.